

Authentication
This page shows you how to authenticate to use our APIs.
At Monkey, you use OAuth2 to authenticate with our APIs and make requests with an API Client linked to an integration user.
Before you start using the APIs, you need to register on our platform. Review these concepts before you begin the registration process:
-
Each customer in Monkey is separated into a concept we call a Program. Programs are segregated, and you need to register in each program you want to participate in.
-
Each user in a program can manage one or more profiles. Profiles are company registrations. There are three types of profiles on our platform:
Sponsors:Client profiles that send accounts payable information to their suppliers.Sellers:Suppliers that have invoices against Clients.Buyers:Funders interested in advancing the accounts payable of Sponsors registered in the program. -
All our APIs follow this pattern: version/profile/profileId. For example, if you have an funder profile and want to query purchases made on the platform, the URL will be v1/buyers/564654 (in this example, the profile ID is 564654).
-
The profile ID is essential for Monkey to understand which company you are acting on behalf of. You can check the ID by accessing the platform and opening the Settings menu, where you will find the company registration data.
-
Monkey has two environments: the Staging environment, used for testing, and the Production environment. These environments are segregated, so data from one environment is not visible in the other.
Now that the basic concepts are clear, follow the step-by-step instructions below to log in to our platform through the API:
Step 1. Create your User
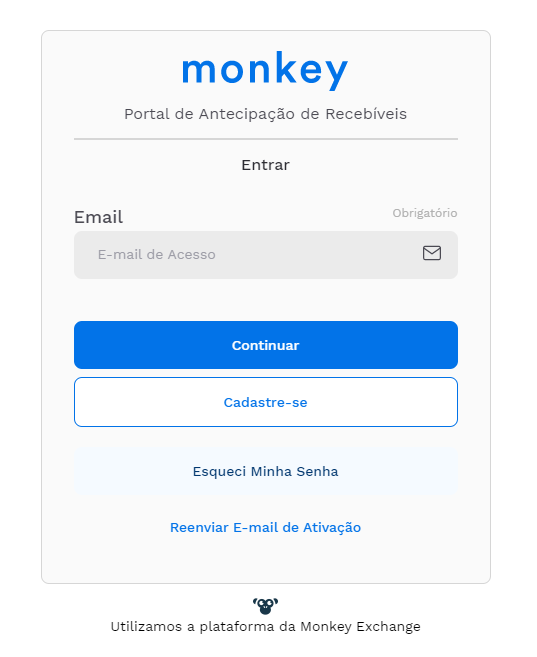
To start your integration, you need to create a user. To do this, you need the URL of the program where you will register. If you do not have the program URL, contact us at [email protected]. After accessing the URL, click the Sign up option and fill in your information:
After creating the user, if your company does not have a registration yet, you need to create the profile by following the instructions on the screen.
If the company is already registered, you need to add this new user to the profile. Follow these steps:
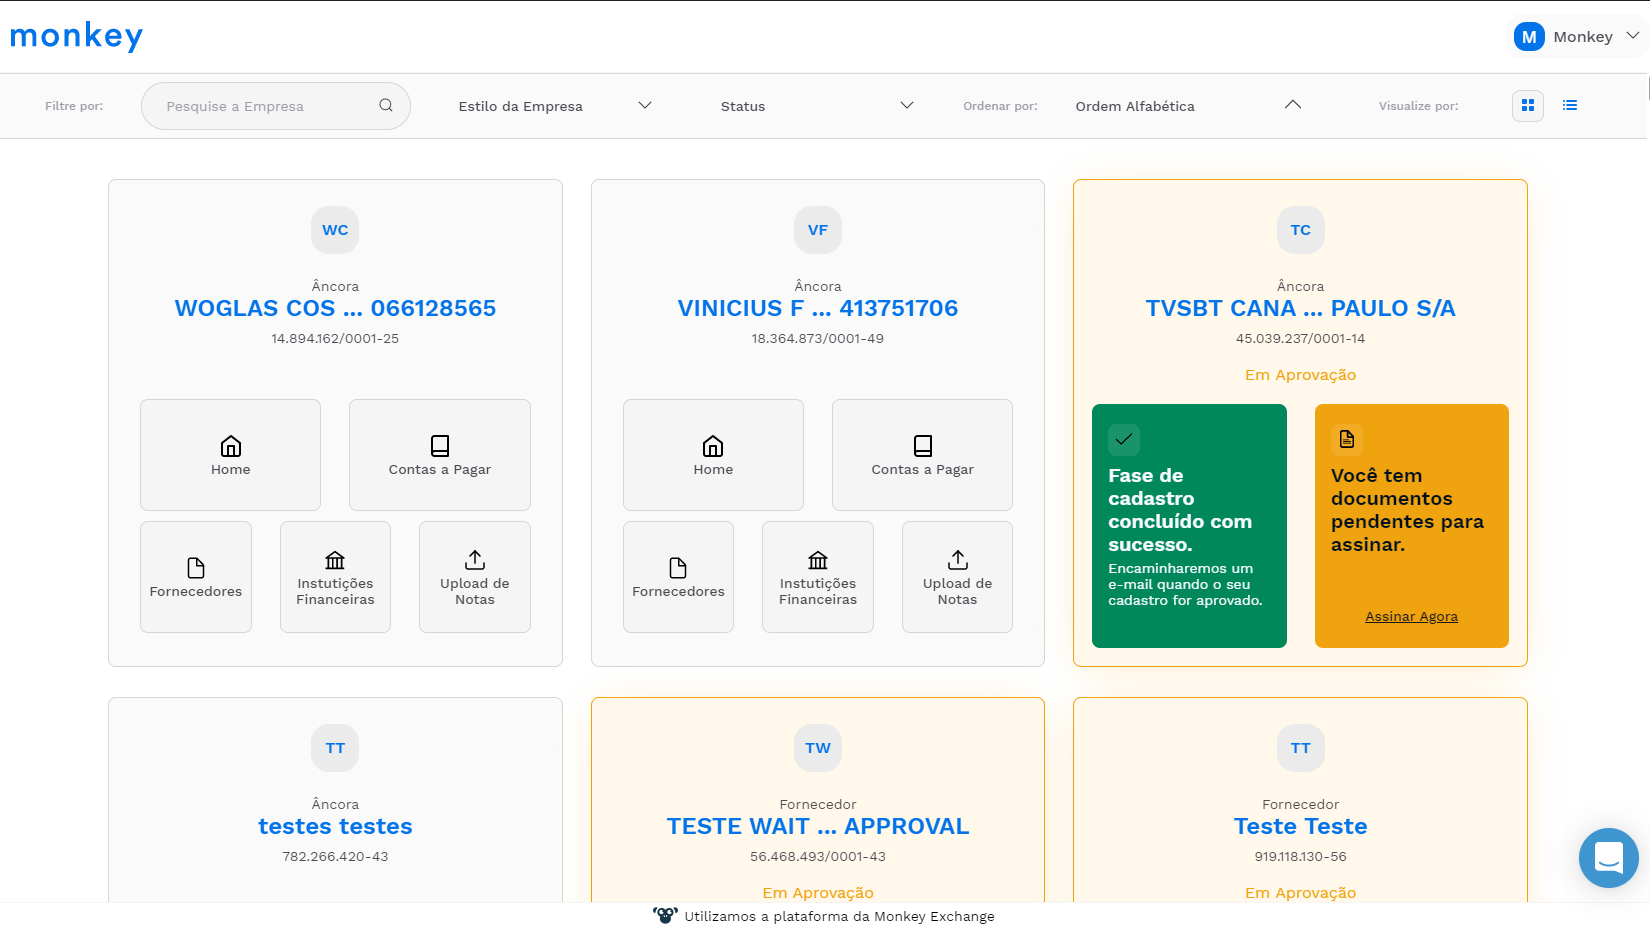
1. Access the Company Profile:
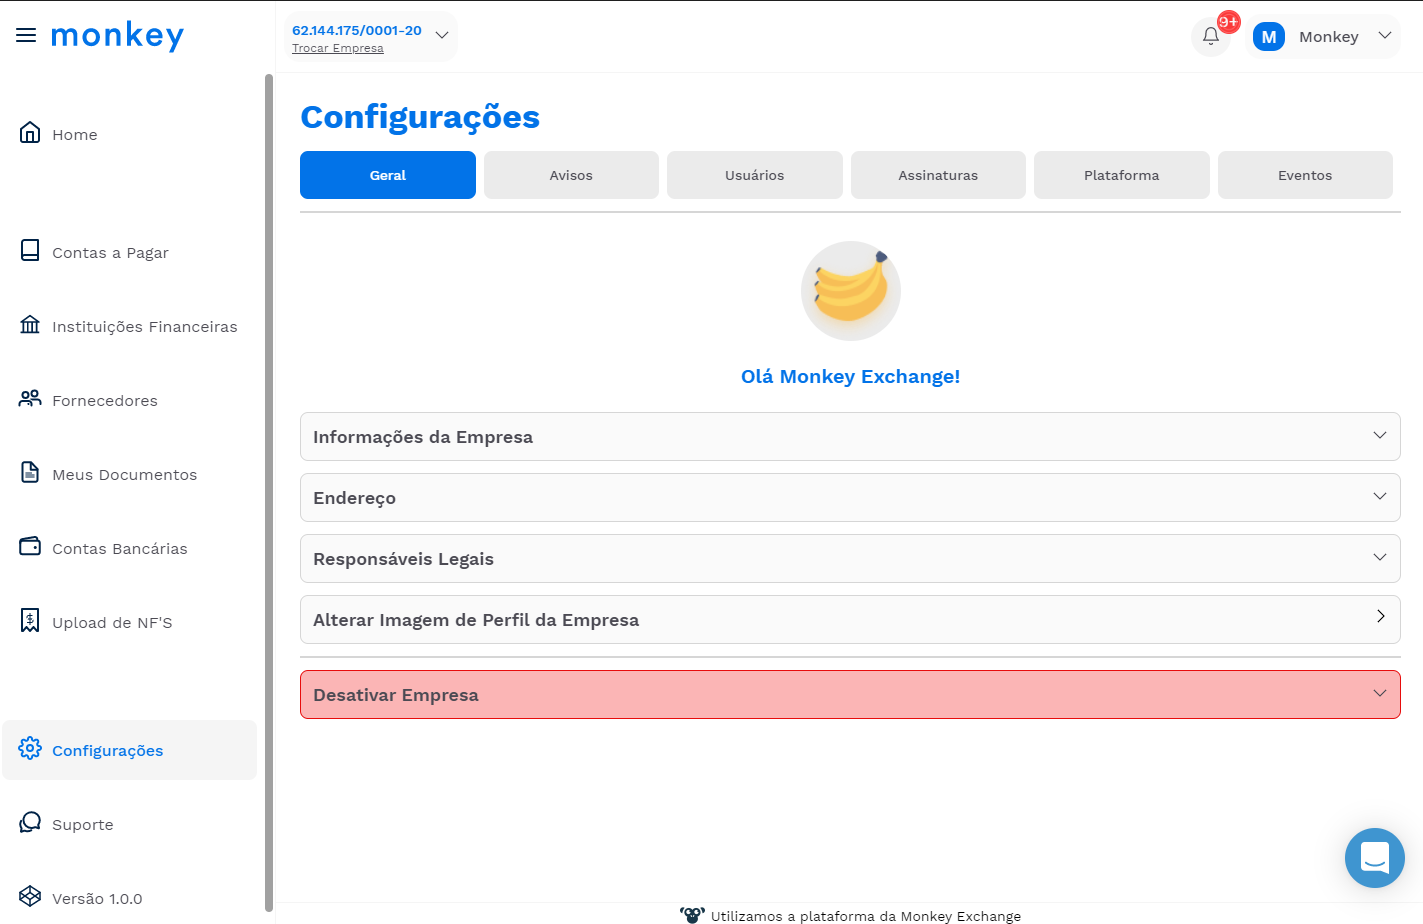
2. Go to Settings:
3. Access the Users option:
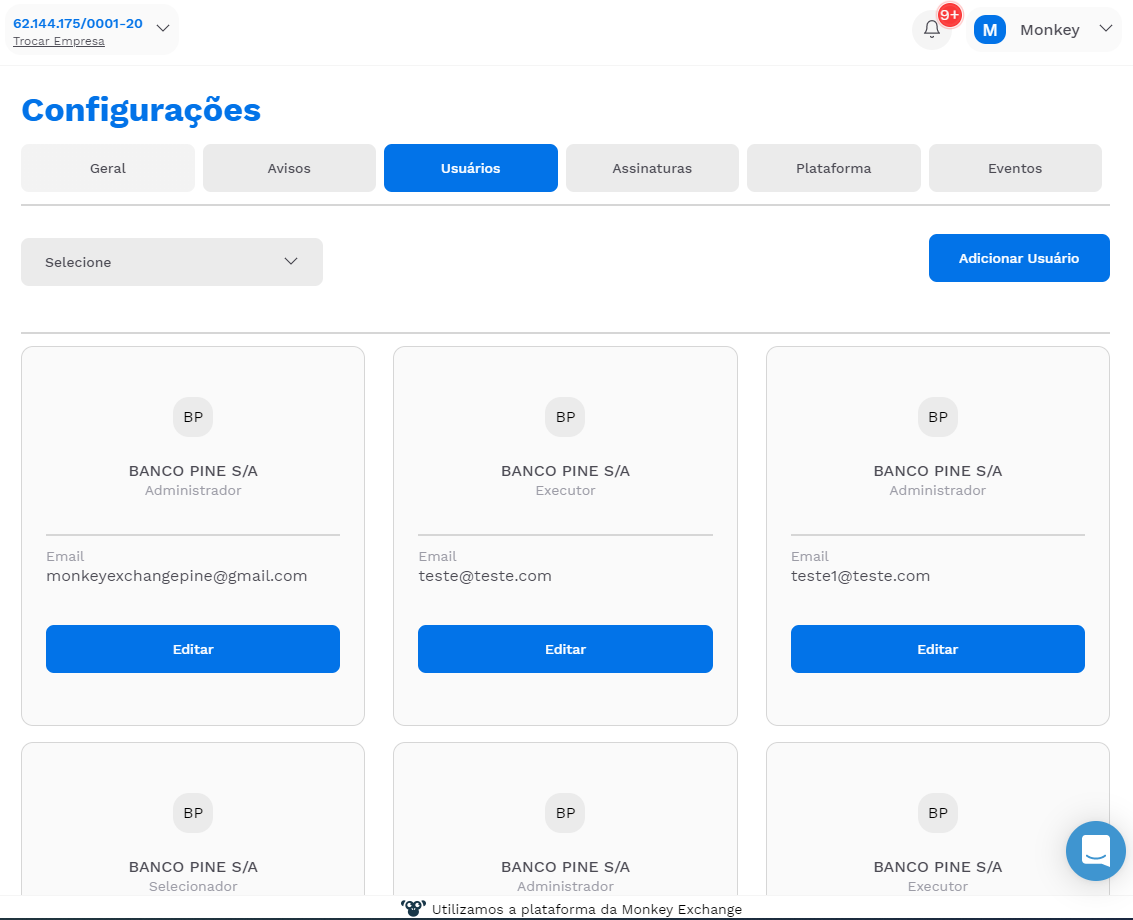
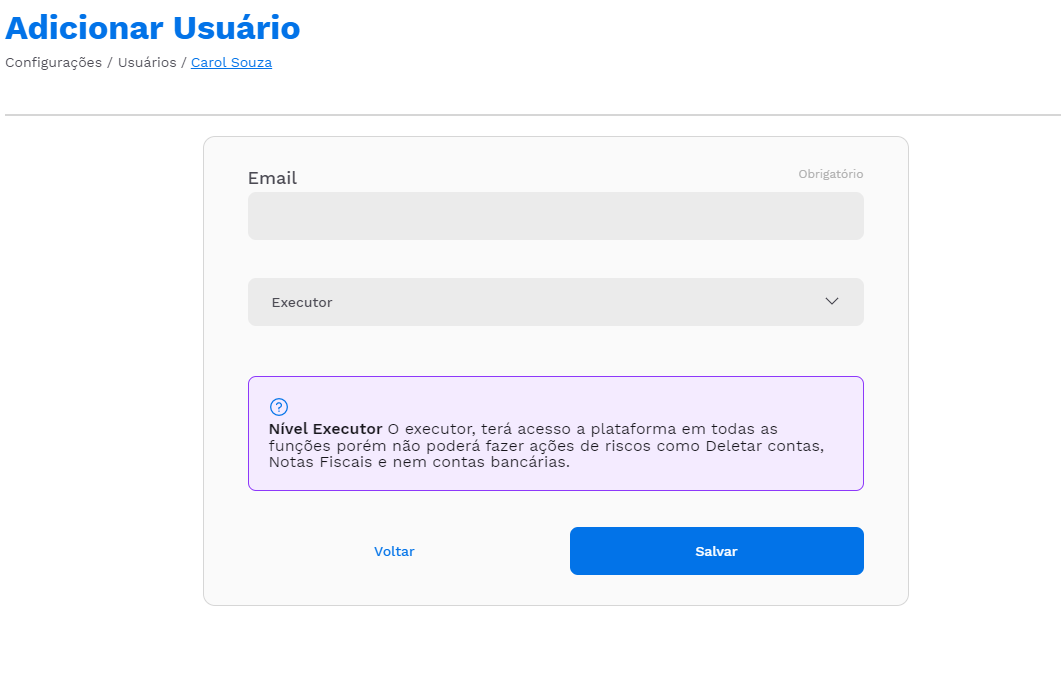
4. Add the Registered User:
Step 2. Create your API Client
As explained above, you need an API Client to make requests to our platform. After you create it, we will generate your client_id and client_secret, which you will use when generating the authentication token:
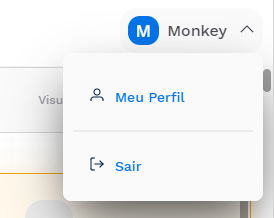
1. After logging in, click My Profile:
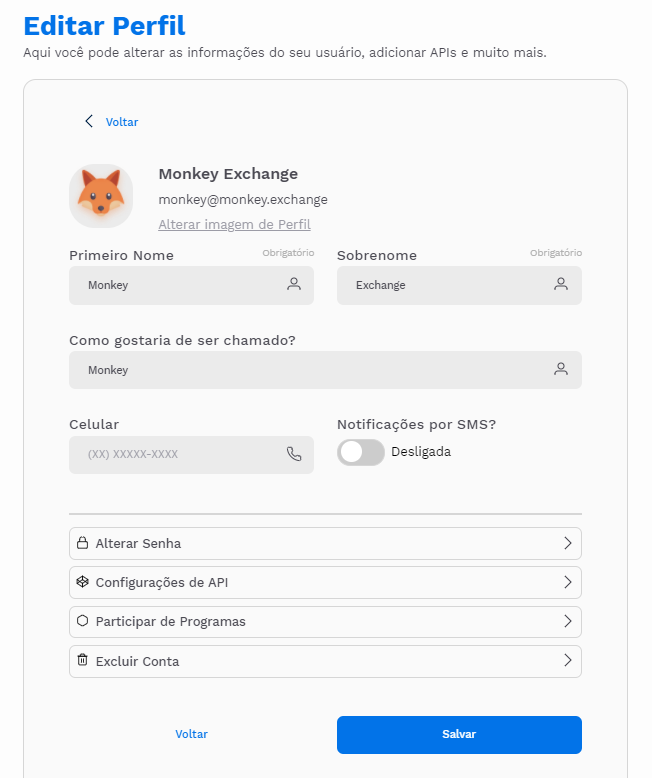
2. Click API Settings:
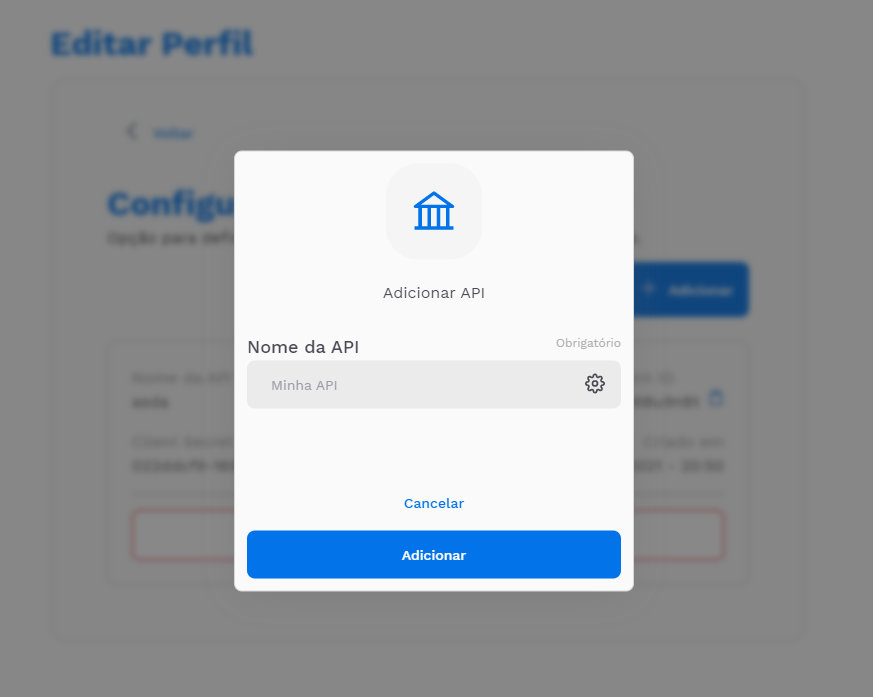
3. Enter the name of your API. This helps us identify your requests:
4. Your client_id and client_secret have been generated, and you can now make requests:
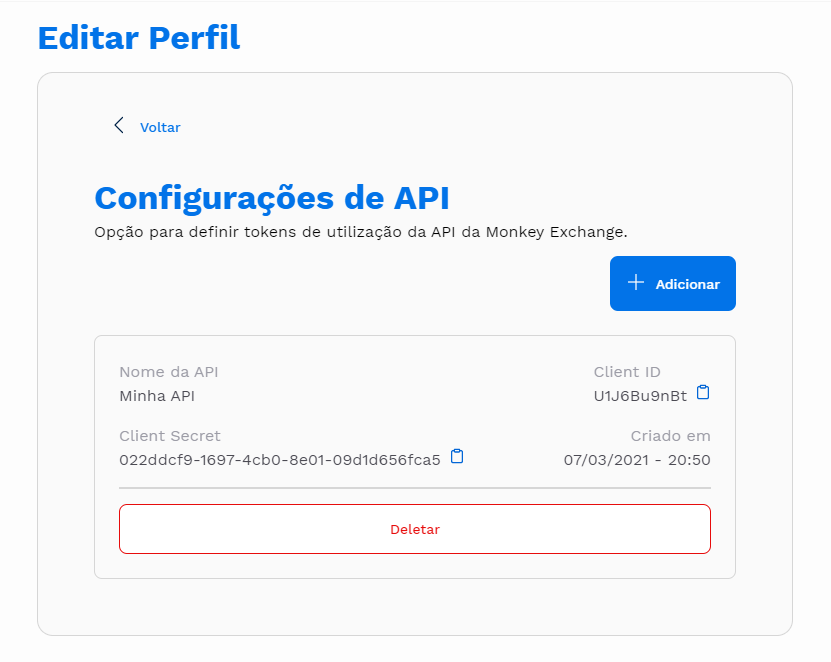
Step 3. Get the Authentication Token
After creating your user and API Client, you can get the authentication token. The token is required for all API calls.
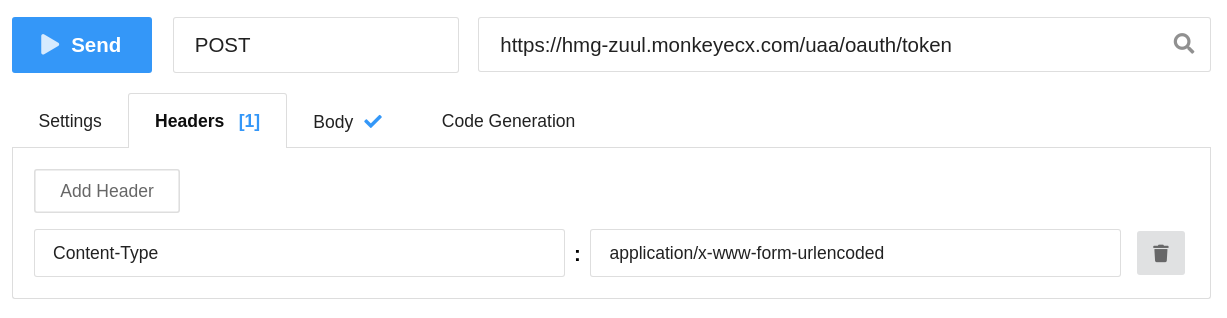
To get the authentication token, make the following request:
Headers:
Content-Type: application/x-www-form-urlencoded
Example:
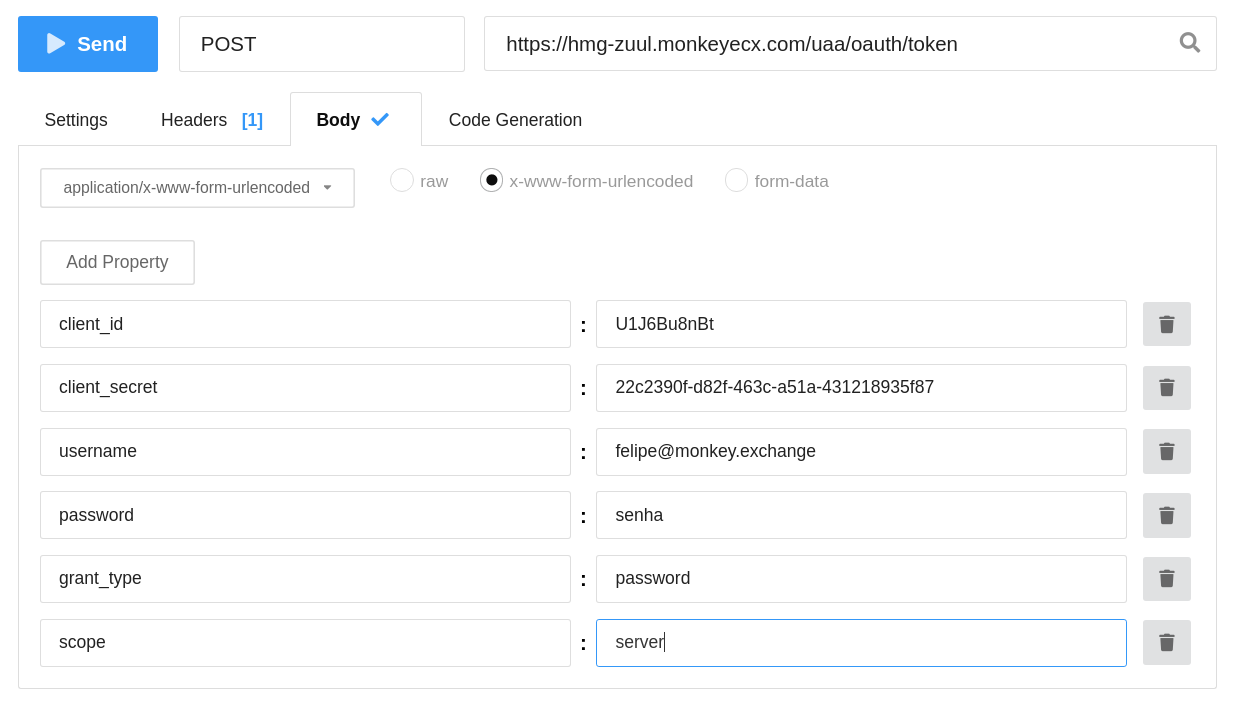
Properties:
client_id: Value generated in the API Client creation step
client_secret: Value generated in the API Client creation step
username: Email of the user registered on the platform
password: Password of the user registered on the platform
grant_type: Fixed value. Always send: password
scope: Fixed value. Always send: server
Example:
If the operation is successful, you will receive a response containing your token (access_token), which must be sent in every request to the platform.
See the example response payload below:
{
  "access_token": "8bf8047e-eb30-45cb-9145-73c759f2a594",
  "token_type": "bearer",
  "refresh_token": "ed6f1cca-2d0f-4341-b7d1-82f9a21171d7",
  "expires_in": 430507,
  "scope": "api"
}
Send the following header in every request using the returned access_token:
Authorization: Bearer 8bf8047e-eb30-45cb-9145-73c759f2a594
See the API details here.
Step 4. Refresh the Authentication Token
As shown above, the authentication token has an expiration time.
After the token expires, you can refresh it.
To get a new authentication token, make the following request:
Headers:
Content-Type: application/x-www-form-urlencoded
Example:
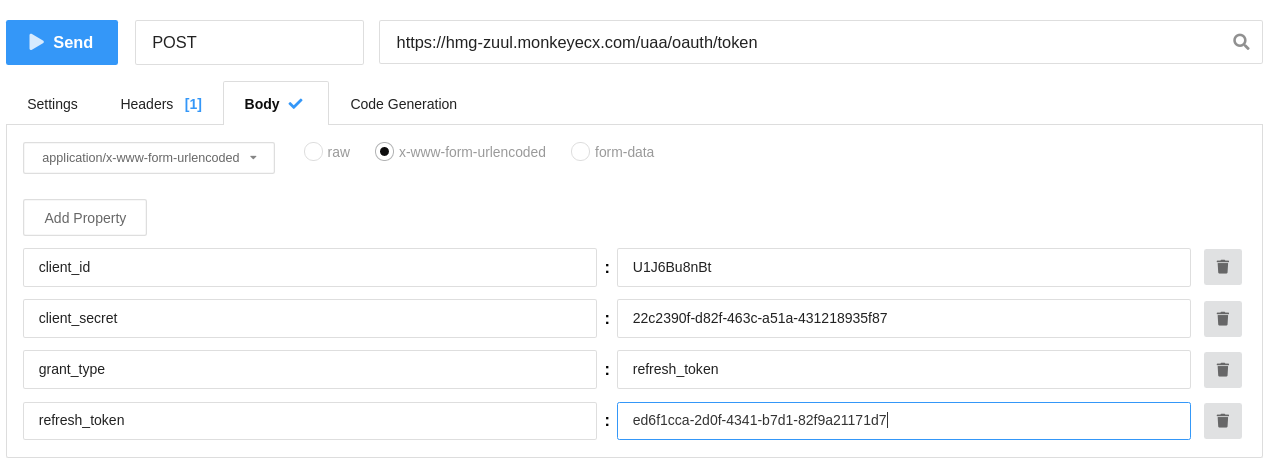
Properties:
client_id: Value generated in the API Client creation step
client_secret: Value generated in the API Client creation step
grant_type: Fixed value. Always send: refresh_token
refresh_token: Value of the refresh_token returned in the Token Generation request
Example:
If the operation is successful, you will receive a response containing your token (access_token), which must be sent in every request to the platform.
See the example response payload below:
{
  "access_token": "8bf8047e-eb30-45cb-9145-73c759f2a594",
  "token_type": "bearer",
  "refresh_token": "ed6f1cca-2d0f-4341-b7d1-82f9a21171d7",
  "expires_in": 430507,
  "scope": "api"
}
Send the following header in every request using the returned access_token:
Authorization: Bearer 8bf8047e-eb30-45cb-9145-73c759f2a594
See the API details here.
Step 5. Get the Profiles Linked to your User
After registering on the platform, you can manage one or more companies. The list of your profiles contains hypermedia links to the base resources. See the details here.
Updated about 2 months ago